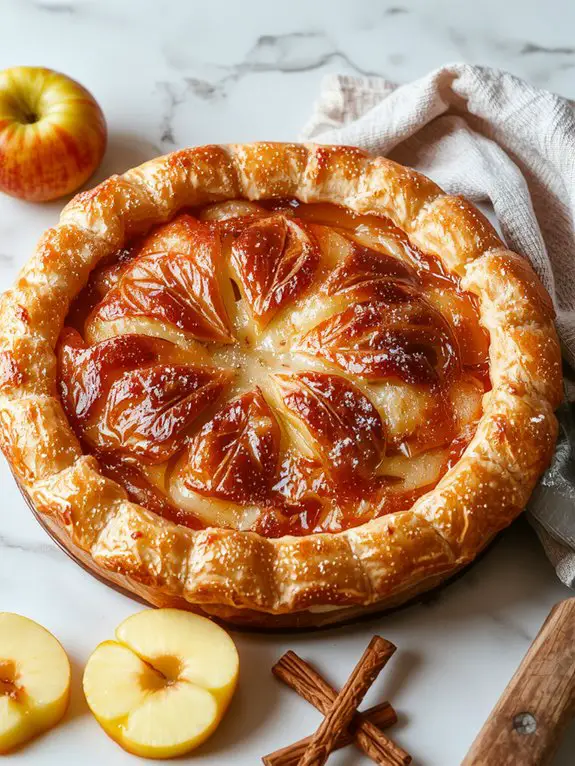
I’ve spent years perfecting this apple pie recipe, and I can tell you that most people make the same critical mistake when choosing their apples. The difference between a soggy, disappointing pie and one that’ll have your family asking for seconds isn’t just in the technique—it’s in understanding which apple varieties work together and why. Let me show you the simple changes that’ll transform your baking.
Recipe
I can vouch for this apple pie recipe and tell you with 100% certainty that once you taste it, every other apple pie will pale in comparison. This isn’t just another pie—it’s the kind that makes people ask for seconds before they’ve finished their first slice, the one that’ll have your kitchen smelling like a cozy autumn day no matter what season it is.
What makes this pie absolutely irresistible is the perfect balance of tart Granny Smith apples with just the right amount of cinnamon and a hint of nutmeg, all nestled in a buttery, flaky crust that practically melts in your mouth.
I’ve been perfecting this recipe for years, tweaking the spice blend and testing different apple combinations until I found the magic formula that creates those tender, caramelized apple slices that hold their shape beautifully while developing the most incredible sweet-tart flavor. Every bite delivers that perfect contrast of textures—the crisp, golden crust giving way to soft, spiced apples that are never mushy or overly sweet.
Trust me, even if you’ve never made a pie from scratch before, this recipe guides you through every step to create something that looks and tastes like it came from the best bakery in town, and the satisfaction of pulling that gorgeous, bubbling masterpiece from your own oven is absolutely unmatched.
Ingredients
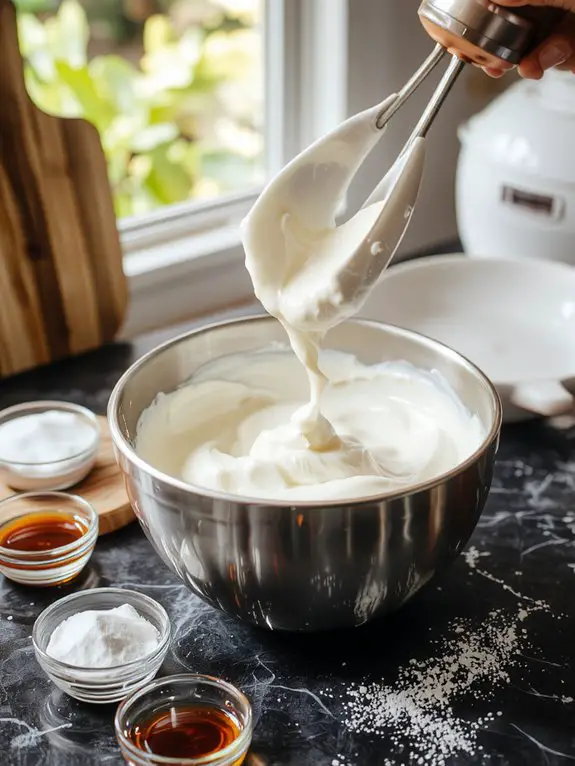
Creating the perfect apple pie starts with selecting quality ingredients that work in harmony—each one plays a pivotal role in achieving that ideal balance of flaky, buttery crust and tender, spiced filling. Here’s the insider scoop: the magic happens when you use cold ingredients for the crust and the right apple varieties that won’t turn to mush during baking.
For the Pie Crust:
- 2½ cups all-purpose flour – The foundation of your flaky crust; don’t substitute with cake flour here
- 1 teaspoon salt – Essential for flavor depth, never skip this
- 1 cup cold unsalted butter, cubed – MUST be cold! This creates those coveted flaky layers
- 6-8 tablespoons ice water – Start with 6 and add more as needed; the key is keeping everything cold
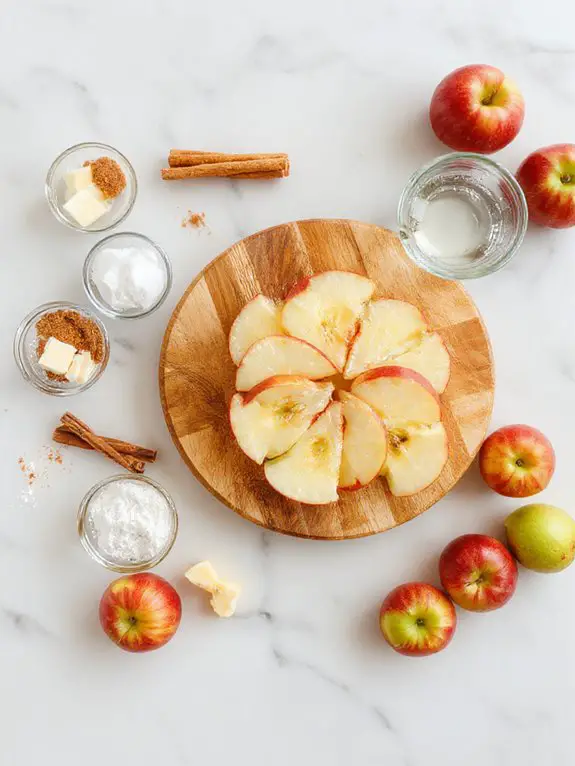
For the Apple Filling:
- 6-8 medium apples, peeled and sliced – Use a mix of Granny Smith and Honeycrisp for the perfect sweet-tart balance and texture
- ¾ cup granulated sugar – Can substitute with brown sugar for deeper flavor
- 2 tablespoons all-purpose flour – This prevents a soggy bottom crust (trust me on this one!)
- 1 teaspoon ground cinnamon – Freshly ground makes a noticeable difference
- ¼ teaspoon nutmeg – A little goes a long way for that warm, cozy flavor
- ¼ teaspoon salt – Enhances all the other flavors
- 2 tablespoons butter, cut into small pieces – Dots of richness throughout the filling
- 1 tablespoon lemon juice – Prevents browning and adds brightness
For Assembly:
- 1 large egg, beaten – For that gorgeous golden egg wash
- 1 tablespoon coarse sugar – Sprinkle on top for bakery-level sparkle and crunch
How to Make the Best Classic Homemade Apple Pie
• Prepare your pie dough and chill it for at least 1 hour before rolling.
Take your homemade or store-bought pie dough out of the refrigerator and let it sit for 5-10 minutes to soften slightly—this prevents cracking when you roll.
Cold dough is your friend here because it creates that flaky, tender crust we’re after. If your dough feels too soft or sticky, pop it back in the fridge for 15 minutes.
• Preheat your oven to 425°F and position the rack in the lower third.
Starting with high heat helps set the bottom crust quickly, preventing that dreaded soggy bottom. The lower rack position guarantees the bottom gets proper heat exposure while the top doesn’t brown too quickly.
This temperature will create steam that puffs up your crust layers beautifully.
• Peel, core, and slice 6-8 medium apples into uniform ¼-inch thick pieces.
Consistent sizing is vital—thick pieces won’t cook through while thin ones turn to mush. Mix apple varieties for complex flavor: Granny Smith for tartness and structure, Honeycrisp for sweetness, or Braeburn for spice.
Toss sliced apples with a tablespoon of lemon juice immediately to prevent browning and add brightness to balance the sweetness.
• Combine apples with sugar, spices, and thickener in a large bowl.
Mix ¾ cup sugar, 2 tablespoons flour (or cornstarch for clearer juices), 1 teaspoon cinnamon, ¼ teaspoon nutmeg, and a pinch of salt. The flour absorbs excess juices during baking, preventing a watery pie.
Let this mixture sit for 15 minutes—the sugar will draw out apple juices, creating a natural syrup that helps everything meld together.
• Roll out the bottom crust on a floured surface to 12-13 inches in diameter.
Work from the center outward, rotating the dough 90 degrees every few rolls to maintain a round shape. The dough should be about ⅛-inch thick—thick enough to support the filling but thin enough to bake through.
If it sticks, add more flour underneath, but don’t overdo it or the crust becomes tough.
• Transfer the bottom crust to a 9-inch pie pan and trim excess to 1-inch overhang.
The easiest transfer method: loosely roll the dough around your rolling pin, then unroll it over the pan. Gently press into the bottom and sides without stretching—stretched dough shrinks during baking.
That 1-inch overhang is key for creating a proper seal with the top crust later.
• Fill the crust with the apple mixture, mounding it slightly in the center.
Don’t pack the apples down—they’ll shrink as they cook, and starting with a generous mound prevents a sunken pie. Dot the filling with 2 tablespoons of cold butter pieces for richness and to help create those delicious caramelized juices.
The center mound also supports the top crust better.
• Roll out the top crust and place it over the filling.
Roll the second dough portion the same way as the first. Drape it over the filling without stretching. Trim the top crust to match the bottom’s overhang.
This creates enough dough to work with for sealing without being wasteful.
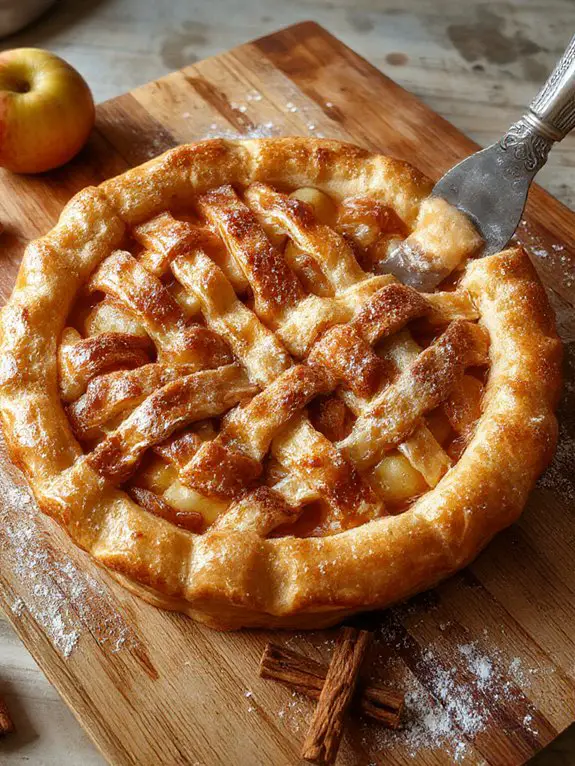
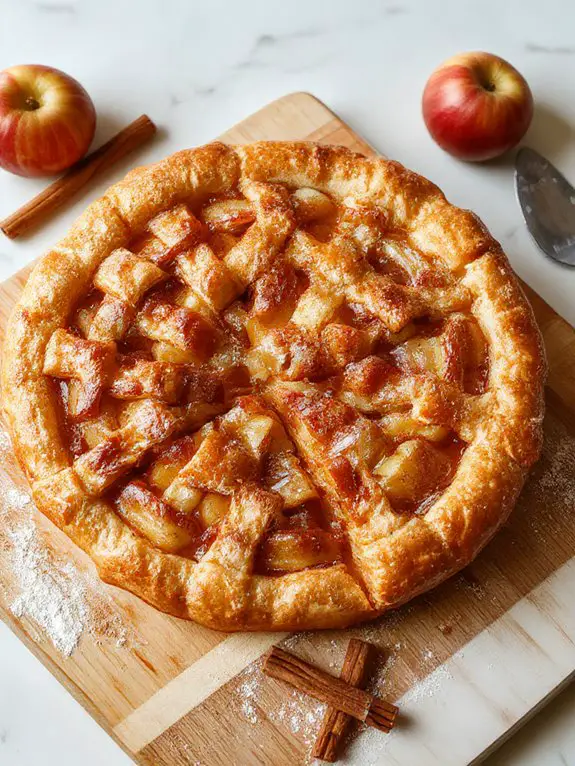
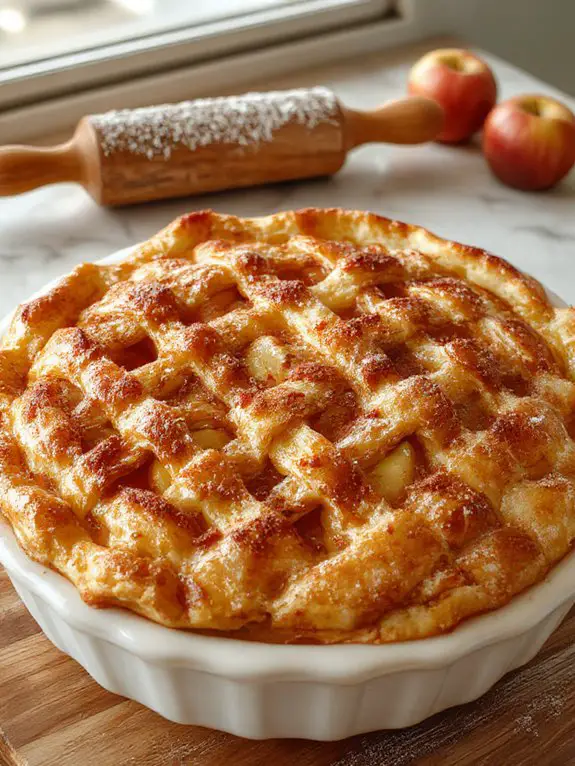
• Seal and crimp the edges, then cut steam vents in the top crust.
Pinch the top and bottom crusts together firmly, then crimp decoratively with a fork or your fingers—this prevents the filling from bubbling out. Cut 4-6 slits or create a decorative pattern in the top crust.
These vents are indispensable for letting steam escape; without them, your crust could crack or become soggy from trapped moisture.
• Brush the top with beaten egg and sprinkle with coarse sugar.
This egg wash creates that gorgeous golden-brown color and adds shine. Coarse sugar (like turbinado) won’t dissolve completely, giving you delightful little sweet, crunchy spots.
Skip this step if you prefer a more rustic look, but the egg wash really makes your pie bakery-beautiful.
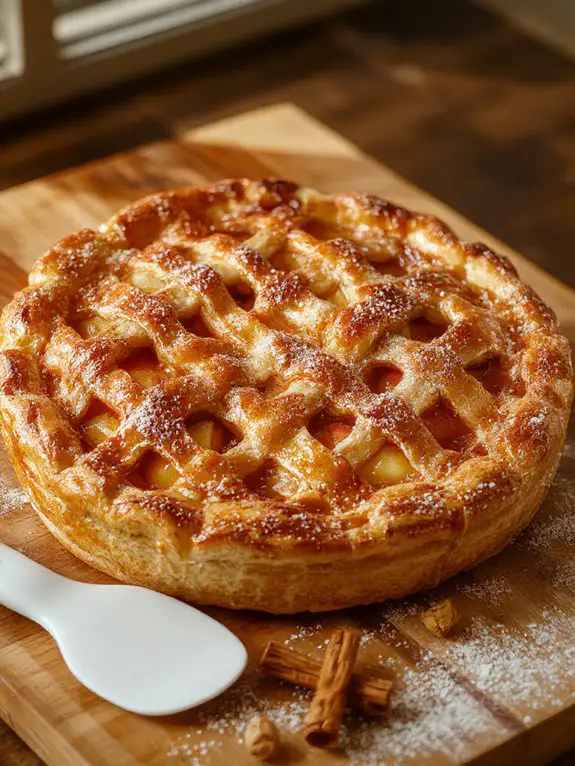
• Bake for 45-55 minutes until the crust is golden and filling bubbles vigorously.
Start checking at 45 minutes—you want sustained bubbling through the vents, not just gentle simmering. The crust should be deep golden brown, not pale. If the edges brown too quickly, cover them with foil strips.
The vigorous bubbling means your thickener has activated and the filling is properly set.
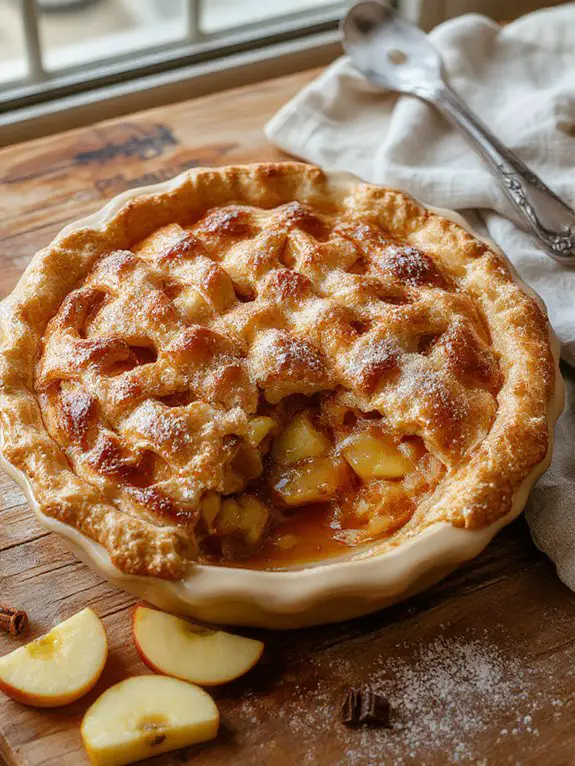
• Cool completely on a wire rack for at least 3 hours before slicing.
This is the hardest part, but it’s critical! Hot pie filling is liquid and will run everywhere when cut. As it cools, the thickener sets up and the filling becomes sliceable.
Cooling on a rack prevents a soggy bottom by allowing air circulation. Trust the process—your patience will be rewarded with perfect slices.
Chef Tips
While mastering apple pie takes practice, a few professional secrets can elevate your results dramatically.
I recommend developing sharp knife skills for uniform apple slices that cook evenly. Use a mandoline for consistent thickness.
When serving, employ plating techniques like dusting powdered sugar through a stencil or adding a quenelle of vanilla ice cream for restaurant-quality presentation.
Nutrition
A traditional apple pie provides a balance of carbohydrates, fats, and essential nutrients from its fruit and pastry components. The nutritional content can vary based on portion size and specific ingredients used.
| Nutrient | Amount per slice (1/8 of 9-inch pie) | % Daily Value |
|---|---|---|
| Calories | 411 | 21% |
| Total Fat | 19g | 29% |
| Saturated Fat | 8g | 40% |
| Cholesterol | 0mg | 0% |
| Sodium | 327mg | 14% |
| Total Carbohydrates | 58g | 19% |
| Dietary Fiber | 2g | 8% |
| Total Sugars | 35g | – |
| Added Sugars | 25g | 50% |
| Protein | 4g | 8% |
| Vitamin C | 3mg | 3% |
| Calcium | 11mg | 1% |
| Iron | 1.6mg | 9% |
| Potassium | 122mg | 3% |
What You’ll Love About This Recipe
This apple pie recipe brings together everything you love about homemade baking, from the buttery, flaky crust that crumbles perfectly with each bite to the tender, cinnamon-spiced apples that taste like autumn in your kitchen. Whether you’re baking for a special occasion or just want to fill your home with that irresistible aroma of fresh pie, this recipe delivers the kind of results that make you feel like a true baking champion.
Perfect balance of sweet and tart flavors – The combination of different apple varieties creates layers of taste that keep every bite interesting, while the blend of warm spices adds just the right amount of cozy comfort without overwhelming the natural fruit flavors.
Foolproof crust technique – This recipe includes simple tricks that help even nervous bakers create a golden, crispy bottom crust and beautiful lattice top that looks like it came straight from a bakery window, no special skills required.
Make-ahead friendly options – You can prepare components in advance, freeze the whole pie for later, or even make extra filling to have on hand, making this recipe perfect for busy schedules and holiday planning.
Recipe Card
This classic American apple pie features a flaky, buttery crust filled with tender, spiced apples that create the perfect balance of sweet and tart flavors.
The combination of cinnamon, nutmeg, and a touch of lemon juice enhances the natural apple taste while creating that irresistible aroma that fills your kitchen.
Ingredients:
- 2½ cups all-purpose flour
- 1 teaspoon salt
- 1 tablespoon granulated sugar
- 1 cup unsalted butter, cold and cubed
- ¼ to ½ cup ice water
- 6-8 medium Granny Smith apples, peeled and sliced
- ¾ cup granulated sugar
- 2 tablespoons all-purpose flour
- 1 teaspoon ground cinnamon
- ¼ teaspoon ground nutmeg
- 2 tablespoons lemon juice
- 2 tablespoons unsalted butter, cut into small pieces
- 1 egg, beaten (for egg wash)
Instructions:
- Mix flour, salt, and sugar in a large bowl. Cut in cold butter until mixture resembles coarse crumbs.
- Gradually add ice water until dough forms. Divide in half, wrap in plastic, and refrigerate for 1 hour.
- Preheat oven to 425°F (220°C).
- Combine sliced apples, sugar, flour, cinnamon, nutmeg, and lemon juice in a large bowl.
- Roll out one dough portion and place in 9-inch pie pan. Fill with apple mixture and dot with butter pieces.
- Roll out second dough portion for top crust. Place over filling and seal edges.
- Cut several slits in top crust and brush with beaten egg.
- Bake for 45-50 minutes until crust is golden brown and filling is bubbly.
- Cool on wire rack for at least 2 hours before serving.
Notes:
Use a mix of tart and sweet apples for best flavor.
Cover edges with foil if browning too quickly during baking.
Equipment:
9-inch pie pan, rolling pin, large mixing bowls, pastry cutter
Time:
Prep time: 30 minutes
Cooking time: 50 minutes
Cuisine:
American
Serving:
8 servings