I’ve spent years perfecting my cinnamon roll technique, and I can tell you there’s nothing quite like the aroma of fresh rolls baking in your kitchen. Most recipes you’ll find online skip the vital steps that separate good rolls from extraordinary ones. The difference lies in understanding how temperature, timing, and technique work together to create that perfect balance of fluffy dough and gooey cinnamon filling that’ll have your family asking what changed.
Recipe
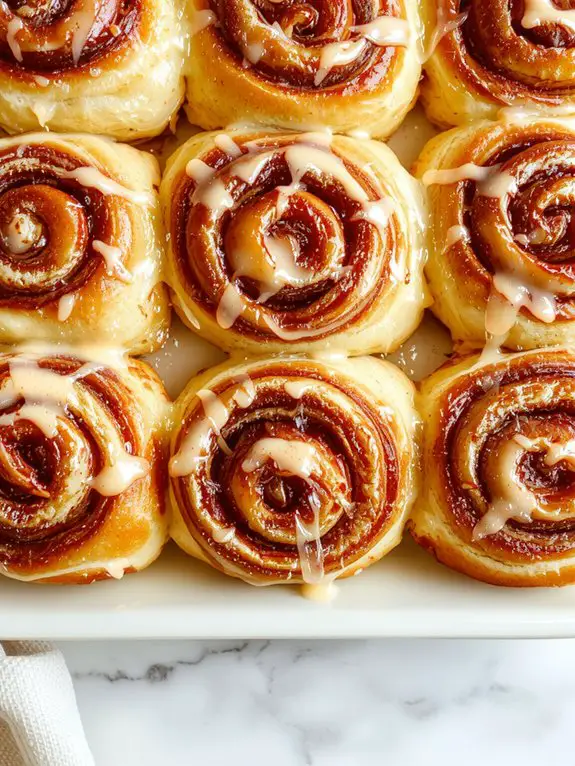
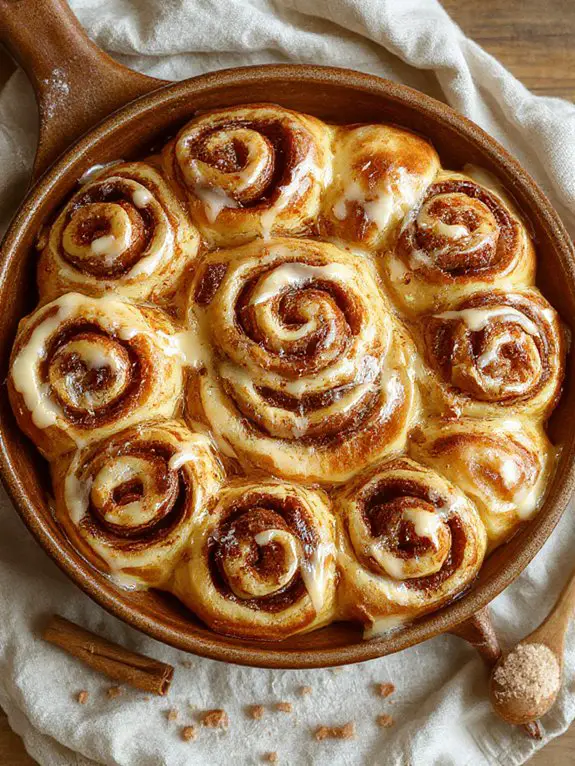
I can tell you with absolute certainty that these cinnamon rolls will become your new obsession—soft, pillowy spirals of pure comfort that practically melt in your mouth with every bite. What makes these rolls extraordinary isn’t just the generous swirl of buttery cinnamon sugar running through each layer, but the way the dough achieves that perfect balance of tender and slightly chewy, thanks to a foolproof technique I’ve perfected through countless Sunday mornings of testing.
My grandmother always said the secret to exceptional cinnamon rolls lies in the patience to let the dough rise properly and the courage to be generous with the filling, and she was absolutely right. When these beauties emerge from the oven, your kitchen will be filled with the intoxicating aroma of warm cinnamon, brown butter, and that unmistakable scent of fresh-baked bread that draws everyone to the kitchen like a magnet.
The final touch—a silky cream cheese glaze that seeps into every crevice—transforms these from simply good to absolutely irresistible. Whether you’re a seasoned baker or someone who usually sticks to boxed mixes, this recipe breaks down every step so clearly that success is practically guaranteed, and trust me, once you taste the difference homemade makes, you’ll never go back to store-bought again.
Ingredients
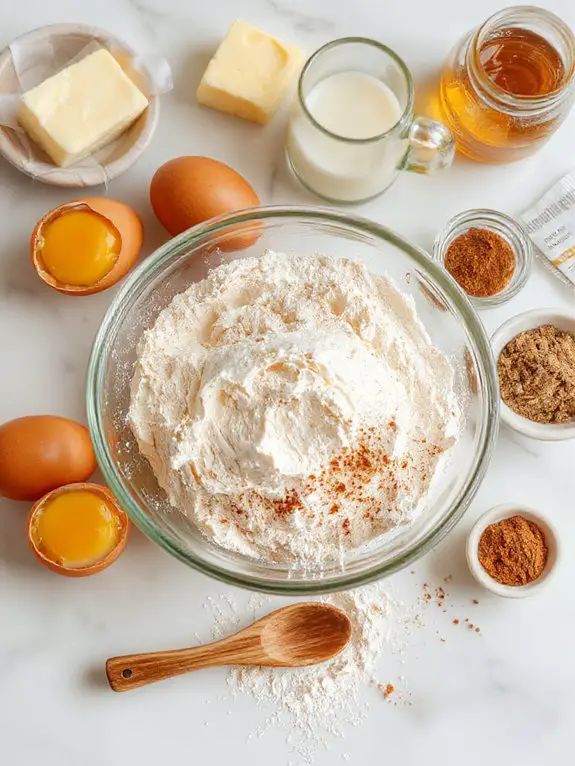
Nothing beats the aroma of homemade cinnamon rolls filling your kitchen, and it all starts with choosing the right ingredients. Here’s the insider scoop: quality matters, but you don’t need to break the bank.
The magic happens when you understand why each ingredient plays its part—from creating that pillowy-soft dough to achieving the perfect gooey center that makes these rolls absolutely irresistible.
For the Dough:
- Bread flour – This is your secret weapon for chewy, bakery-style texture. All-purpose works too, but bread flour’s higher protein content creates better structure
- Instant yeast – Skip the proofing step and mix directly into flour. Active dry yeast works fine, just dissolve it in warm milk first
- Whole milk – The fat content creates tender crumb. Buttermilk adds tang if you’re feeling fancy, or use 2% milk in a pinch
- Unsalted butter – Room temperature is non-negotiable for proper mixing. Salted butter works, just reduce added salt by half
- Large eggs – Brings richness and helps bind everything together. Room temperature eggs mix better than cold
- Granulated sugar – Feeds the yeast and adds subtle sweetness to balance the cinnamon
- Salt – Don’t skip this! It enhances every other flavor and controls yeast activity
For the Filling:
- Unsalted butter – Softened, not melted. This spreads easily and won’t make your dough soggy
- Brown sugar – Dark brown sugar is the move here—more molasses means deeper flavor than light brown
- Ground cinnamon – Fresh cinnamon makes a noticeable difference. If yours has been sitting around for years, splurge on a new jar
- Pinch of salt – Trust me on this one—it makes the cinnamon pop
For the Glaze:
- Powdered sugar – Sift it if you want ultra-smooth glaze, but honestly, a few lumps add character
- Cream cheese – Full-fat only! Low-fat versions don’t melt properly and taste chalky
- Heavy cream or milk – Heavy cream creates luxurious richness, but whole milk works perfectly fine
- Vanilla extract – Pure vanilla is worth every penny here
How to Make the Best Classic Homemade Cinnamon Rolls
This is your foundation step—getting the yeast happy and bubbly is essential for fluffy rolls. The milk should feel warm but not hot against your wrist (like a baby’s bath). If it’s too hot, you’ll kill the yeast; too cool, and it won’t activate.
Let this mixture sit for 5-10 minutes until it becomes foamy on top—this tells you your yeast is alive and ready to work.
• In a large mixing bowl, combine the yeast mixture with ⅓ cup melted butter, ⅓ cup granulated sugar, 1 large egg, and 1 teaspoon salt****
Make certain your butter has cooled slightly before adding—you don’t want to scramble the egg or shock the yeast.
Whisk these wet ingredients together until well combined. The sugar feeds the yeast and adds sweetness, while the egg provides structure and richness.
This liquid base will make your dough tender and flavorful.
• Gradually add 3-4 cups all-purpose flour, starting with 3 cups and mixing until a soft dough forms****
Add flour one cup at a time to avoid creating a dense, heavy dough. The exact amount depends on humidity and how you measure flour—start with less and add more as needed.
Your dough should be soft and slightly sticky but manageable. If you dump all the flour in at once, you risk overworking the dough and ending up with tough rolls.
• Turn dough onto a floured surface and knead for 6-8 minutes until smooth and elastic****
This is where the magic happens—kneading develops the gluten that gives your rolls structure.
The dough should go from shaggy and sticky to smooth and supple. You’ll know it’s ready when you can stretch a small piece thin enough to see light through it without tearing.
Don’t rush this step; proper kneading is the difference between dense rolls and bakery-quality ones.
• Place dough in a greased bowl, cover with a damp towel, and let rise in a warm spot for 1 hour until doubled****
A warm (not hot) environment speeds up rising—try the top of your refrigerator or an oven with just the light on.
The damp towel prevents a skin from forming on the dough. You’ll know it’s ready when you can gently poke the dough with your finger and the indentation stays.
This first rise develops flavor and creates the light, airy texture you want.
• For the filling, mix ½ cup softened butter with ⅔ cup brown sugar and 1½ tablespoons ground cinnamon****
Your butter should be soft enough to spread easily but not melted—leave it out for about an hour before starting.
Brown sugar adds deeper flavor than white sugar and creates those gorgeous caramelized edges.
Mix these ingredients into a spreadable paste that won’t tear your dough when applied.
• Punch down risen dough and roll into a 12×18 inch rectangle on a floured surface
Punching down releases excess gas and redistributes the yeast for even texture.
When rolling, work from the center outward and rotate the dough occasionally to maintain an even thickness. Don’t worry about perfect edges—rustic is fine.
The rectangle should be about ¼ inch thick for rolls that aren’t too dense or too thin.
• Spread filling evenly over dough, leaving a ½-inch border along one long edge
Use an offset spatula or the back of a spoon to spread the filling gently—you don’t want to tear the dough.
That clean border helps the seam seal properly when you roll it up. Make certain the filling reaches the corners; every bite should have that perfect cinnamon-sugar swirl.
• Starting from the long edge opposite the clean border, tightly roll the dough into a log
Roll firmly but don’t squeeze—you want to maintain those beautiful layers without compressing them.
As you roll, the filling will stay put and create distinct spirals.
A tight roll guarantees your cinnamon rolls won’t unravel during baking and gives you those picture-perfect swirls.
• Using a sharp knife or dental floss, cut the log into 12 equal pieces
Dental floss is a baker’s secret weapon—it cuts cleanly without squishing the rolls.
If using a knife, use a sawing motion rather than pressing straight down.
Mark your log before cutting to make certain of even pieces. Each roll should be about 1½ inches thick for the perfect ratio of dough to filling.
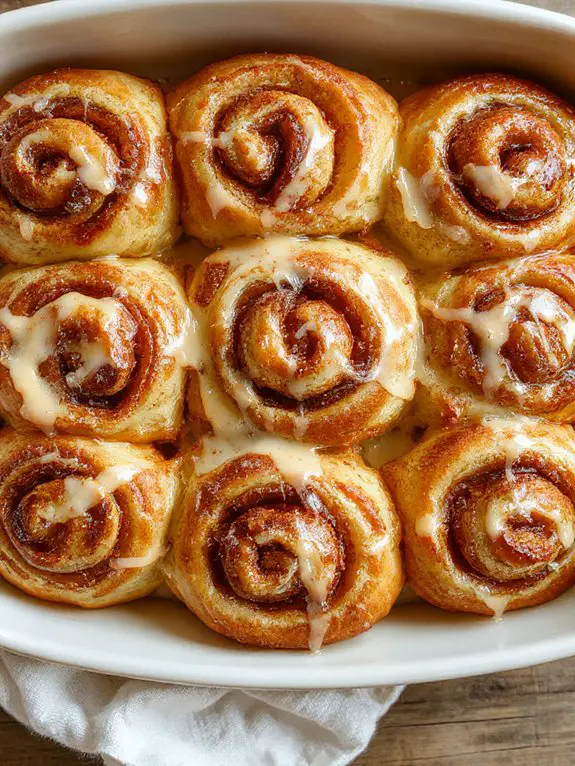
• Place rolls cut-side up in a greased 9×13 inch baking dish, cover, and let rise 30-45 minutes until puffy****
Arrange rolls with a little space between them—they’ll touch as they rise and bake, creating those signature soft sides.
This second rise is shorter but just as essential for light, fluffy texture.
They’re ready when they look noticeably puffed and spring back slowly when gently touched.
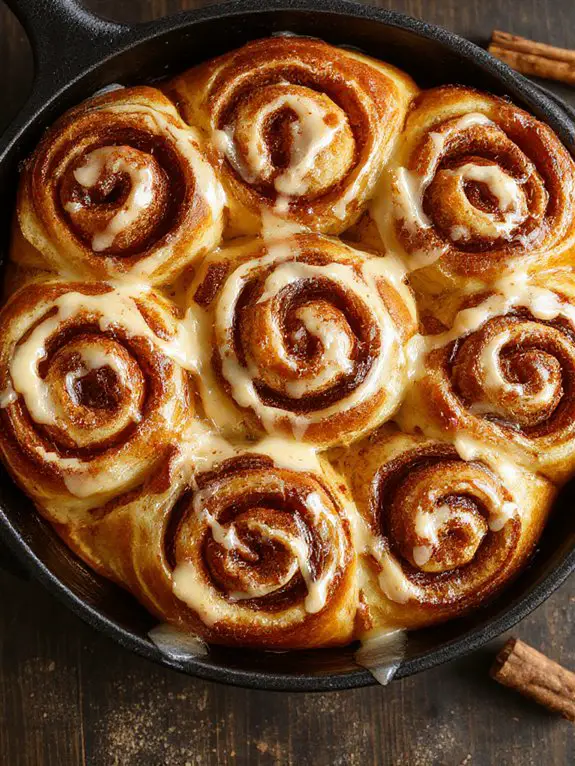
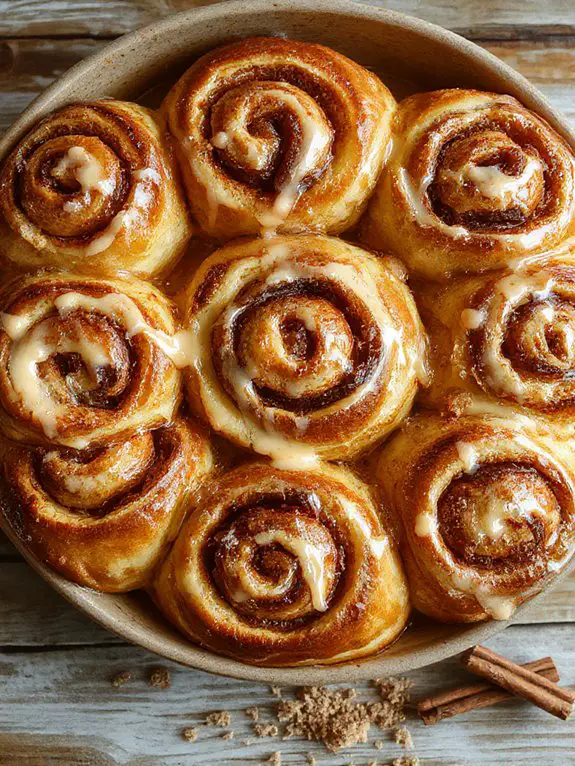
• Bake at 375°F for 20-25 minutes until golden brown on top****
Your oven should be fully preheated before the rolls go in.
They’re done when the tops are golden and the internal temperature reaches 190°F.
Don’t open the oven door for the first 15 minutes—this can cause them to deflate.
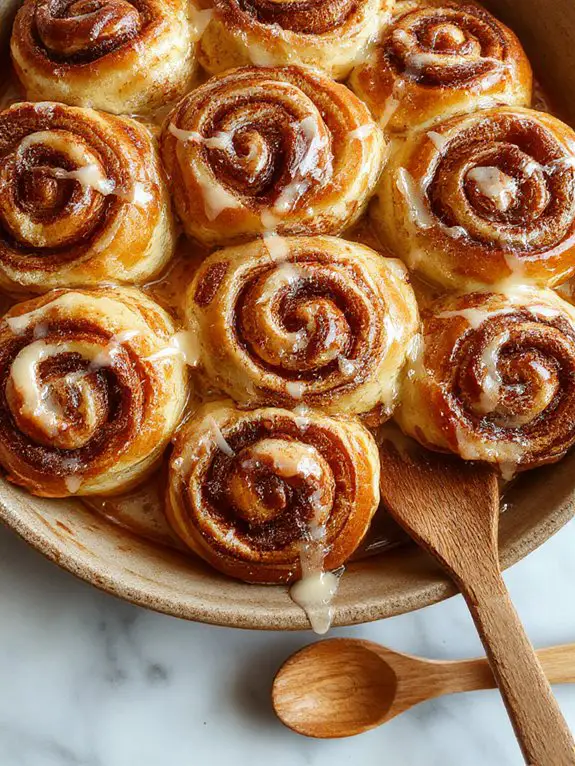
The tops should be beautifully golden, and you might see some caramelized filling bubbling around the edges.
• Cool for 5-10 minutes before glazing with powdered sugar icing made from 1 cup powdered sugar, 2-3 tablespoons milk, and ½ teaspoon vanilla****
This brief cooling prevents the glaze from completely melting off, but they should still be warm enough for the glaze to soak in slightly.
Whisk the glaze ingredients until smooth—start with less milk and add more for your desired consistency.
Drizzle generously while the rolls are warm for that bakery-style finish that makes everyone swoon.
Chef Tips
While making cinnamon rolls seems straightforward, there’s a handful of professional tricks that’ll elevate your homemade batch from good to extraordinary.
I recommend mastering proper kneading techniques—develop the gluten through consistent folding rather than aggressive pushing.
For exceptional results, experiment with flavor pairings like cardamom-orange zest or maple-vanilla combinations that complement the classic cinnamon beautifully.
Nutrition
Understanding the nutritional content of your homemade cinnamon rolls helps you make informed dietary choices. The following breakdown is based on one standard-sized cinnamon roll from a typical recipe.
| Nutrient | Amount per serving |
|---|---|
| Calories | 312 |
| Total Fat | 11g |
| Saturated Fat | 6g |
| Trans Fat | 0g |
| Cholesterol | 45mg |
| Sodium | 285mg |
| Total Carbohydrates | 48g |
| Dietary Fiber | 2g |
| Total Sugars | 18g |
| Added Sugars | 15g |
| Protein | 6g |
| Vitamin A | 8% DV |
| Calcium | 4% DV |
| Iron | 12% DV |
What You’ll Love About This Recipe
There’s something magical about the smell of fresh cinnamon rolls baking in your oven, filling your home with that warm, sweet aroma that makes everyone gather in the kitchen. This recipe creates those perfect bakery-style rolls you’ve been craving, but with the satisfaction of making them completely from scratch in your own home.
Incredibly soft and fluffy texture – These rolls turn out pillowy-soft every single time, with layers that pull apart beautifully and practically melt in your mouth.
Simple ingredients you already have – No need for special trips to the store, as this recipe uses basic pantry staples like flour, butter, sugar, and cinnamon that most home bakers keep on hand.
Make-ahead friendly for busy mornings – You can prepare these rolls the night before, pop them in the fridge, and simply bake them fresh in the morning for an effortless weekend breakfast or special occasion treat.
Recipe Card
These homemade cinnamon rolls feature a soft, pillowy dough swirled with a fragrant cinnamon-sugar filling and topped with a creamy glaze. Perfect for weekend mornings or special occasions, this recipe creates bakery-quality rolls that are irresistibly tender and bursting with warm spice flavor.
Ingredients:
For the dough:
- 3½ cups all-purpose flour
- 1 packet (2¼ teaspoons) active dry yeast
- 1 cup warm milk (110°F)
- ⅓ cup granulated sugar
- ⅓ cup unsalted butter, melted
- 1 large egg
- 1 teaspoon salt
For the filling:
- ½ cup unsalted butter, softened
- ¾ cup brown sugar, packed
- 2 tablespoons ground cinnamon
For the glaze:
- 1 cup powdered sugar
- 3-4 tablespoons milk
- ½ teaspoon vanilla extract
Instructions:
- In a small bowl, dissolve yeast in warm milk and let stand for 5 minutes until foamy.
- In a large mixing bowl, combine flour, sugar, and salt. Add the yeast mixture, melted butter, and egg. Mix until a soft dough forms.
- Knead dough on a floured surface for 8-10 minutes until smooth and elastic. Place in a greased bowl, cover, and let rise for 1 hour until doubled.
- Punch down dough and roll into a 16×12-inch rectangle on a floured surface.
- Spread softened butter evenly over dough. Mix brown sugar and cinnamon, then sprinkle over butter.
- Starting from the long side, tightly roll up the dough. Cut into 12 equal slices using a sharp knife or dental floss.
- Place rolls in a greased 9×13-inch baking dish. Cover and let rise for 30-45 minutes until puffy.
- Preheat oven to 375°F. Bake for 25-30 minutes until golden brown.
- For glaze, whisk together powdered sugar, milk, and vanilla until smooth. Drizzle over warm rolls.
Notes:
Rolls can be prepared the night before through step 7, then refrigerated and baked in the morning. Allow extra rising time if baking from cold. For extra soft rolls, brush tops with melted butter before baking.
Equipment:
Large mixing bowl, measuring cups and spoons, rolling pin, 9×13-inch baking dish, kitchen towel, sharp knife or unflavored dental floss
Time:
Prep time: 30 minutes
Cooking time: 30 minutes
Rising time: 1 hour 45 minutes
Total time: 2 hours 45 minutes
Cuisine: American
Serving: 12 rolls