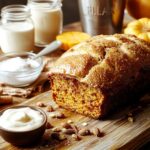

Recipe
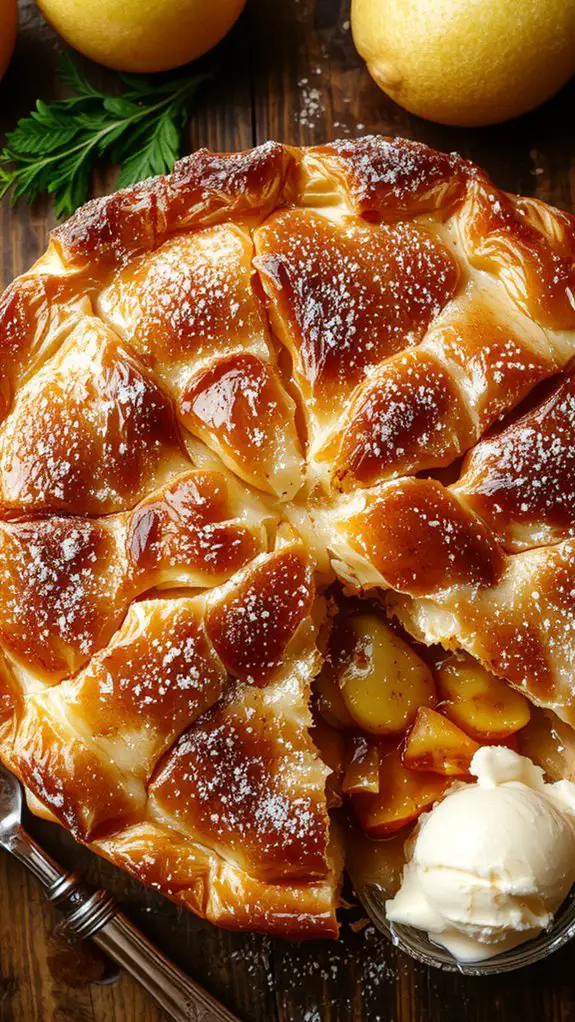
If there’s one dessert that feels like a hug in food form, it’s this homemade apple pie. I’ve made this recipe countless times, and I can confidently say it’s the best version out there—crisp, flaky crust paired with tender, cinnamon-spiced apples that melt in your mouth.
The secret? A touch of brown sugar for depth and a splash of vanilla to elevate the flavor to something extraordinary.
Every bite is a perfect balance of sweet, tangy, and buttery goodness, with that irresistible aroma of baked apples and warm spices wafting through your kitchen. Trust me, once you try this, you’ll never settle for store-bought again.
Plus, it’s easier to make than you think—ready to impress friends, family, or just your own sweet tooth. Let’s get baking!
Ingredients
Creating the perfect homemade apple pie starts with selecting the right ingredients. Quality matters here—fresh, flavorful components will elevate your pie from good to unforgettable. Let’s break it down so you can nail this classic dessert with confidence.
- For the Crust:
- *All-purpose flour*: The base of your crust—use cold flour to keep the dough tender.
- *Unsalted butter*: Cold butter is key for flaky layers. If you’re in a pinch, shortening works, but butter delivers unmatched flavor.
- *Ice water*: Keeps the dough cool and pliable. Add it gradually—too much makes the crust tough.
- *Pinch of salt*: Balances the sweetness and enhances the overall flavor.
- For the Filling:
- *Apples*: Use a mix of tart (like Granny Smith) and sweet (like Honeycrisp) for depth. Avoid overly soft varieties—they’ll turn mushy.
- *Granulated sugar*: Sweetens the filling without overpowering the apples.
- *Brown sugar*: Adds a caramel-like richness. Darker sugar gives more depth, but light works too.
- *Ground cinnamon*: A must-have for that warm, cozy spice. Feel free to add a pinch of nutmeg or allspice for extra complexity.
- *Lemon juice*: Brightens the filling and prevents browning. Freshly squeezed is best, but bottled works in a pinch.
- *Cornstarch*: Thickens the filling to the perfect consistency. Arrowroot or tapioca flour are solid alternatives.
- For Finishing:
- *Egg wash*: Beaten egg with a splash of milk for a golden, glossy crust. Milk alone works, but the egg gives it that bakery-level sheen.
- *Coarse sugar*: Sprinkled on top for a touch of crunch and sparkle. Optional, but highly recommended.
Pro tip: If you’re short on time, a store-bought crust can work, but nothing beats the buttery, flaky texture of homemade.
And don’t skimp on the apples—this is the star of the show!
How to Make the Best Perfect Apple Pie Recipe

- Preheat your oven to 375°F (190°C). This guarantees the oven is at the right temperature when your pie goes in, which helps achieve an even bake and a crisp crust.
- Roll out your pie crust to about 12 inches in diameter and place it in a 9-inch pie dish. Gently press it into the edges and trim any excess dough.
Pro Tip: Chill the dough for 10 minutes before rolling to prevent sticking.
– Prepare the apple filling by peeling, coring, and slicing about 6–8 medium-sized apples into thin, even slices.
Toss them in a large bowl with ¾ cup sugar, 2 tablespoons flour, 1 teaspoon cinnamon, and a pinch of nutmeg.
Watch Out: Coating the apples in flour helps thicken the filling and prevents it from becoming too runny.
– Fill the pie crust with the apple mixture, mounding it slightly in the center.
Dot the top with 2 tablespoons of cold butter, cut into small pieces. This adds richness and helps caramelize the filling.
– Roll out the second pie crust and place it over the apples.
Seal the edges by crimping them with a fork or pinching them together.
Cut a few small slits in the top crust to allow steam to escape during baking.
Visual Cue: The crust should be golden brown when done, and the filling should bubble through the slits.
– Optional: Brush the top crust**** with a beaten egg and sprinkle with a light dusting of sugar. This gives the pie a shiny, golden finish.
Time-Saving Trick: Use milk instead of egg for a simpler glaze.
– Bake the pie on the middle rack for 50–60 minutes, or until the crust is golden and the filling is bubbling.
Flexibility: If the edges brown too quickly, cover them with foil to prevent burning.
– Cool the pie for at least 2 hours before slicing. This allows the filling to set and makes for cleaner slices.
Patience pays off here—digging in too soon can lead to a messy pie!
– Serve warm or at room temperature, ideally with a scoop of vanilla ice cream or a dollop of whipped cream. Enjoy your homemade masterpiece!
Nutrition
This delicious homemade apple pie is packed with nutrients. Here’s the nutritional breakdown per serving:
| Nutrient | Amount per serving |
|---|---|
| Calories | 320 kcal |
| Total Fat | 14 g |
| Saturated Fat | 6 g |
| Cholesterol | 30 mg |
| Sodium | 230 mg |
| Total Carbs | 45 g |
| Dietary Fiber | 3 g |
| Sugars | 25 g |
| Protein | 3 g |
Chef Tips
When you’re making apple pie from scratch, I always recommend chilling your pie dough before rolling it out—it’ll be much easier to work with and result in a flakier crust.
Use a mix of tart and sweet apples for balanced flavor. Don’t overfill the pie, or it’ll bubble over.
Brush the crust with an egg wash for a golden finish. Let it cool before slicing to set the filling.
Frequently Asked Questions
Can I Use a Different Type of Fruit?
Yes, you can use a different fruit! I’ve swapped apples for peaches or berries before—just adjust the sugar and spices to match. Pears work great too, but they’ll need less time to soften. Experiment and enjoy!
How Do I Store Leftover Apple Pie?
I cover leftover pie tightly with foil or plastic wrap and keep it at room temp for up to two days. If I need it to last longer, I refrigerate it for up to five days.
Can I Freeze the Pie Before Baking?
Yes, I can freeze the pie before baking. I’ll assemble it, wrap it tightly in plastic wrap, then foil, and freeze. When ready to bake, I’ll add 15-20 minutes to the usual baking time straight from the freezer.
What’s the Best Way to Reheat Apple Pie?
I’d reheat my apple pie in the oven at 350°F for about 10-15 minutes to keep the crust crispy. I’d cover it with foil if it’s browning too fast. Microwaving works but can make the crust soggy.
Can I Make the Crust Gluten-Free?
Yes, I can make the crust gluten-free by swapping regular flour for a gluten-free blend. I’ll use xanthan gum if it’s not included to help bind it. It’ll still taste great and hold its shape.