
Recipe
This chili recipe is the one you’ll keep coming back to—it’s hearty, flavorful, and so satisfying you’ll swear it was simmered all day (spoiler: it doesn’t have to be!). What makes it special? A perfect blend of spices, tender chunks of beef, and a rich, smoky tomato base that comes together in one pot.
I’ve made this countless times for game days, family dinners, and cozy nights in, and it always hits the spot. The secret? A touch of cocoa powder for depth and a splash of beer for brightness—trust me, it’s a game-changer.
Imagine a bowl filled with bold, savory flavors, a hint of warmth from the chili powder, and just the right amount of kick. Whether you’re a chili pro or a first-timer, this recipe is foolproof and guaranteed to make your kitchen smell amazing.
Ready to jump in? Let’s get cooking!
Ingredients
The secret to a knockout chili lies in the quality and balance of its ingredients. Start with the best you can find, and don’t be afraid to tweak based on what you have on hand. Here’s what you’ll need:
- Ground Beef or Turkey (2 lbs): Opt for 80/20 beef for rich flavor, or use turkey for a leaner option.
- Beef Broth (4 cups): Homemade is ideal, but store-bought low-sodium works too.
- Canned Tomatoes (28 oz, crushed or diced): San Marzano tomatoes add a sweet, robust depth.
- Tomato Paste (2 tbsp): This is non-negotiable—it thickens the chili and intensifies the tomato flavor.
- Kidney Beans (2 cans, drained and rinsed): Swap in pinto or black beans if preferred.
- Onion (1 large, diced): Yellow or white onions work best for their savory sweetness.
- Garlic (4 cloves, minced): Fresh garlic is a must for that aromatic punch.
- Chili Powder (3 tbsp): Use a blend you trust, or make your own for a custom flavor.
- Cumin (1 tbsp): Essential for that warm, earthy undertone.
- Smoked Paprika (1 tsp): Adds a subtle smokiness—don’t skip it!
- Cayenne Pepper (1/2 tsp, or to taste): Adjust for heat level based on your preference.
- Bay Leaves (2): They infuse the chili with a subtle herbal note—just remember to remove them before serving.
- Salt & Black Pepper (to taste): Season as you go for balanced flavor.
- Olive Oil (2 tbsp): For sautéing the onions and garlic—don’t skimp!
*Pro Tip*: For an extra layer of flavor, add a splash of Worcestershire sauce or a square of dark chocolate during simmering. These little tweaks can elevate your chili to restaurant-quality status.
*Substitutions*: No ground beef? Try shredded chicken or a plant-based meat alternative. Out of beef broth? Use chicken or vegetable broth instead.
*Little Wins*: Top your chili with fresh cilantro, shredded cheese, sour cream, or a squeeze of lime for a final flourish.
How to Make the Best Chili Recipe Title Instance

– Simmer to perfection – Let the chili simmer uncovered for at least 30 minutes, stirring occasionally. The longer it simmers, the thicker and more flavorful it becomes.
*Visual Cue: The chili should thicken slightly but still be spoonable, not overly dry.*
– Taste and adjust seasoning – Before serving, taste the chili and add more salt, pepper, or spices if needed.
*Time-Saving Trick: If you’re short on time, simmer for at least 15 minutes—it’ll still taste great.*
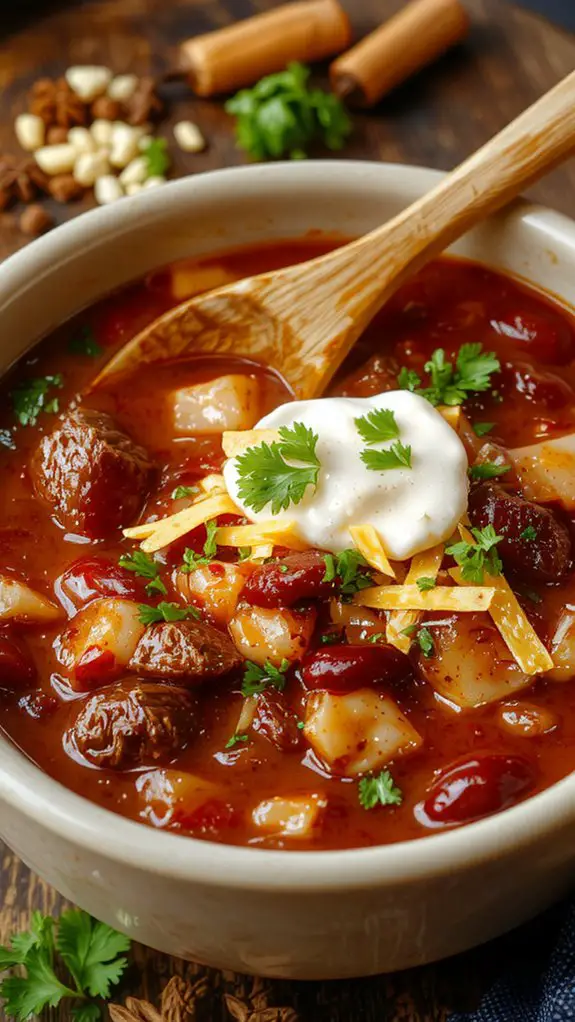
– Serve and enjoy – Ladle the chili into bowls and top with your favorite garnishes like shredded cheese, sour cream, or green onions.
*Why Behind the Step: Toppings add texture and freshness, balancing the rich, hearty chili.*
Nutrition
This homemade chili recipe provides a hearty and nutritious meal. Below are the nutritional details per serving:
| Nutrient | Amount |
|---|---|
| Calories | 320 |
| Protein | 22g |
| Carbohydrates | 25g |
| Fat | 12g |
| Fiber | 6g |
| Sodium | 480mg |
Chef Tips
Since making chili can vary depending on personal taste, I’ll share some tips to help you get it just right.
Brown your meat well for depth of flavor.
Toast dried chilies before blending for a richer taste.
Simmer low and slow—it’s worth the wait.
Adjust heat with cayenne or chipotle, not just chili powder.
Finish with a splash of vinegar or lime to brighten flavors.
Taste as you go!
Frequently Asked Questions
What Is the Origin of Chili?
Chili’s origins trace back to 16th-century Spanish settlers in Texas and northern Mexico. I’ve learned they combined indigenous ingredients like chili peppers with meat, creating a hearty stew that evolved into the chili we recognize today.
Can I Freeze Leftover Chili?
Yes, I freeze leftover chili all the time. I let it cool completely, then store it in airtight containers or freezer bags. It keeps for up to three months, and I reheat it on the stove.
What Are Common Chili Toppings?
I love topping my chili with shredded cheese, sour cream, and green onions. Sometimes I’ll add diced avocado, crushed tortilla chips, or a squeeze of lime. Cornbread or crackers on the side are great, too.
Is Chili Considered Healthy?
I think chili can be healthy, depending on how I make it. Using lean meat, beans, veggies, and less salt boosts its nutrition. If I load it with cheese or sour cream, it’s less healthy, though.
How Long Does Chili Last in the Fridge?
I usually keep my chili in the fridge for about 3-4 days if it’s stored in an airtight container. Any longer, and I worry about it spoiling, so I freeze it if I need it to last.