
Recipe
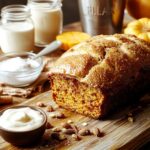
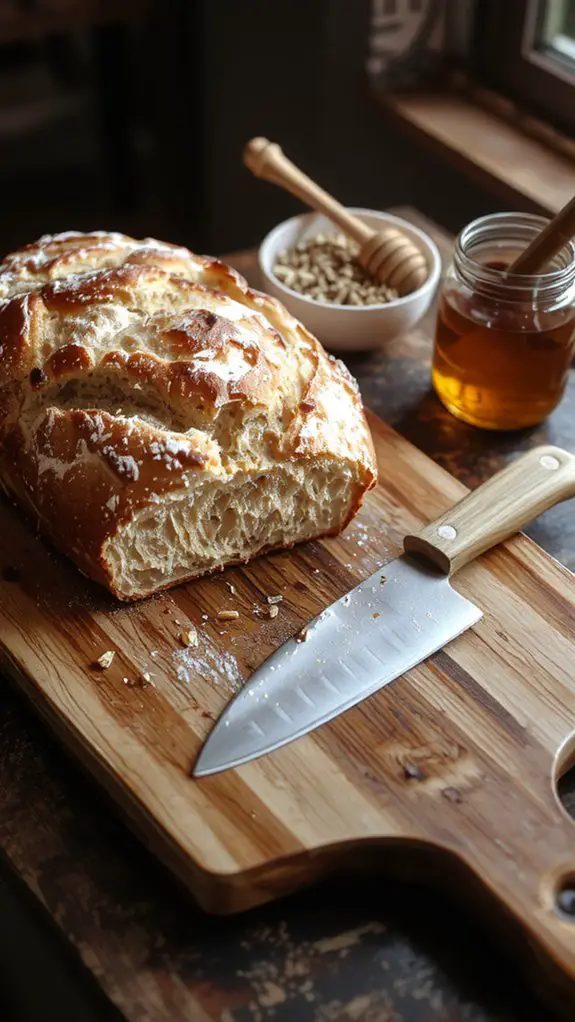
Let’s get one thing straight: This homemade bread recipe is the real deal, and once you taste it, you’ll never go back to store-bought loaves again.
There’s something magical about the aroma of fresh bread filling your kitchen, the crackle of the crust as it cools, and the soft, pillowy interior that practically melts in your mouth.
What sets this recipe apart? It’s all about simplicity—just a handful of quality ingredients and a little patience.
I’ve been baking this loaf for years, tweaking it here and there, and I can confidently say it’s foolproof.
Warm slices slathered with butter, sprinkled with flaky salt, or dipped into olive oil—this bread is a blank canvas for endless possibilities.
Trust me, once you try it, you’ll understand why homemade bread is worth every moment of effort. Let’s get baking!
Ingredients
Crafting the perfect loaf of bread starts with the right ingredients. Each one plays a vital role in texture, flavor, and rise. Don’t settle for less—seek out quality components for a bakery-worthy result. Here’s what you’ll need:
- Bread flour: Its higher protein content creates a chewy, structured crumb. All-purpose flour works, but your loaf won’t have the same bite.
- Water: Use lukewarm water (around 110°F) to activate the yeast without killing it. Coldwater slows fermentation, while hot water risks deactivating the yeast entirely.
- Active dry yeast: The magic ingredient for rising. Proof it in water with a pinch of sugar to confirm it’s alive and active. Instant yeast is a great shortcut—skip the proofing step.
- Salt: Non-negotiable. It enhances flavor and strengthens gluten. Fine sea salt dissolves evenly.
- Sugar or honey: Adds a hint of sweetness and feeds the yeast. Honey lends a subtle floral note.
- Olive oil or butter: Adds richness and softness to the crumb. Olive oil keeps it dairy-free, while butter offers a richer flavor.
- Optional extras: Mix-ins like seeds, nuts, or herbs elevate your bread. Roll oats or sesame seeds on top for a crunchy finish.
How to Make the Best Basic White Loaf Recipe

– Prepare your yeast
Dissolve the yeast in warm water (around 110°F) with a pinch of sugar—this activates the yeast and guarantees your bread will rise properly.
If the water is too hot, it can kill the yeast, so aim for a temperature similar to warm bath water.
– Mix the dry ingredients
In a large bowl, combine the flour and salt.
Whisk them together to guarantee even distribution of the salt, which enhances flavor and strengthens the dough’s structure.
– Combine wet and dry ingredients
Add the activated yeast mixture and any other wet ingredients (like oil or milk) to the dry ingredients.
Stir until a shaggy dough forms. This initial mixing doesn’t need to be perfect—just get everything combined before kneading.
– Knead the dough
Turn the dough onto a lightly floured surface and knead for about 8-10 minutes.
Use the heel of your hand to push the dough away from you, then fold it back over itself.
Proper kneading develops gluten, giving the bread its structure and texture. The dough should become smooth and elastic.
– Let the dough rise
Place the dough in a lightly greased bowl, cover it with a clean kitchen towel or plastic wrap, and let it rise in a warm, draft-free spot for 1-2 hours, or until it doubles in size.
This first rise is essential for creating airy, well-textured bread.
– Shape the loaf
Once risen, punch down the dough to release any air bubbles.
Shape it into a loaf by folding the edges toward the center and rolling it tightly.
Place it in a greased loaf pan or on a baking sheet, seam side down.
– Proof the dough
Cover the shaped dough and let it rise again for 30-60 minutes, or until it’s puffy and nearly doubled.
This second rise guarantees the bread has the right volume and lightness before baking.
– Preheat and prepare for baking
While the dough proofs, preheat your oven to 375°F (190°C).
For a crisp crust, you can place a small pan of water on the bottom rack to create steam during baking. This helps the bread rise fully before the crust sets.
– Bake the bread
Place the loaf in the preheated oven and bake for 25-35 minutes, or until the top is golden brown and the bread sounds hollow when tapped on the bottom.
Avoid opening the oven door too early, as this can cause the bread to collapse.
– Cool and slice
Remove the bread from the oven and let it cool in the pan for 5-10 minutes, then transfer it to a wire rack to cool completely.
Cutting into the bread too soon can make it gummy, so patience here is key.
– Pro Tip: Store properly
To keep your bread fresh, store it in a paper bag or bread box at room temperature for up to 2 days.
For longer storage, wrap it tightly in plastic wrap and freeze—it’ll stay fresh for up to 3 months.
– Watch-Out Warning: Don’t overmix or overknead
Overworking the dough can lead to a dense, tough loaf.
Stop kneading when the dough is smooth and elastic, and mix only until the ingredients are just combined.
Nutrition
Nutritional content varies based on ingredients and serving size. Values are approximate per slice (28g).
| Nutrient | Amount per Serving |
|---|---|
| Calories | 75 |
| Total Fat | 0.8g |
| Saturated Fat | 0.1g |
| Cholesterol | 0mg |
| Sodium | 150mg |
| Total Carbs | 14g |
| Dietary Fiber | 0.8g |
| Sugars | 1.4g |
| Protein | 2.4g |
Chef Tips
If you’re aiming for perfect homemade bread, I’ve found that small adjustments make a big difference. Always use warm water for yeast activation, never hot—it’ll kill it.
Knead dough until it’s smooth and elastic, about 8-10 minutes. Let it rise in a warm, draft-free spot.
Slash the top before baking to control expansion. Cool completely before slicing to avoid a gummy texture.
Frequently Asked Questions
Can I Use a Bread Machine for This Recipe?
Absolutely, I’ve used a bread machine for this recipe, and it works perfectly. I just follow the same steps and ingredients, letting the machine handle kneading and rising, then bake it in the oven for the crust.
How Do I Store the Bread to Keep It Fresh?
I store my bread in a paper or cloth bag at room temperature for short-term freshness. For longer storage, I keep it in an airtight container or plastic bag, and I’ll sometimes freeze slices if needed.
Can I Freeze the Dough for Later Use?
Yes, I can freeze the dough for later use. After kneading, I’ll wrap it tightly in plastic wrap or place it in an airtight container. When ready, I’ll thaw it in the fridge overnight before baking.
What’s the Best Way to Reheat Leftover Bread?
I’d wrap leftover bread in foil and warm it at 350°F for 10 minutes. If it’s a bit stale, I’d sprinkle water on it first to bring back moisture. A toaster works for slices too.
How Do I Know When the Bread Is Fully Baked?
I’ll tap the bottom of the loaf—if it sounds hollow, it’s done. I’ll also check the crust for a golden-brown color and confirm the internal temperature’s around 190–200°F with a thermometer. That’s how I know it’s baked.