Recipe
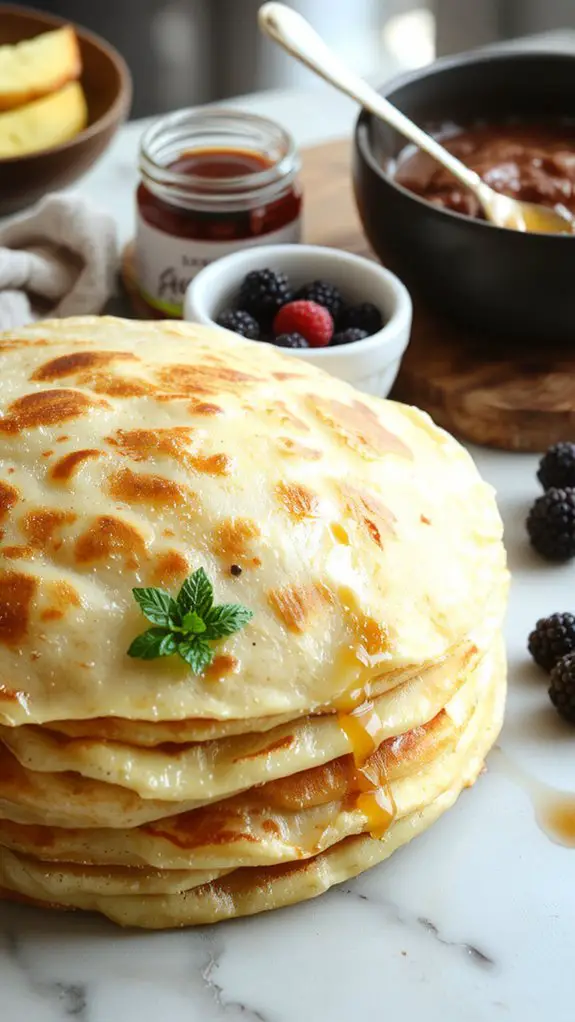
There’s something magical about a perfectly made crepe—thin, buttery, and just delicate enough to melt in your mouth while still holding all your favorite fillings. This recipe? It’s the one I swear by, the kind that turns breakfast into an event and dessert into a showstopper.
The secret? A simple batter with a splash of vanilla and a pinch of salt to balance the sweetness, whisked until silky smooth. Whether you fold them around fresh berries, drizzle them with chocolate, or go classic with a squeeze of lemon and sugar, these crepes are impossibly light yet satisfyingly rich.
Trust me, once you master this (and you will), you’ll never go back to store-bought or diner versions again. Let’s make crepes that’ll have everyone at the table begging for seconds.
Ingredients
For the lightest, most delicate crepes, the right ingredients make all the difference. Stick to simple pantry staples, but pay attention to the details—small tweaks can elevate your crepes from good to restaurant-quality. Here’s what you’ll need:
- All-purpose flour: The base of your batter. Use sifted flour for a smoother texture.
- Eggs: Fresh, room-temperature eggs bind the batter and add richness.
- Milk: Whole milk works best for creaminess, but 2% can be substituted.
- Water: Thins the batter slightly for that perfect lace-like consistency.
- Unsalted butter: Melted butter adds flavor and helps prevent sticking. Use clarified butter for cooking if you want crisp edges.
- Sugar: A pinch enhances sweetness—skip it for savory crepes.
- Salt: Balances the flavors—don’t omit!
- Vanilla extract: Optional, but adds a warm, aromatic note to sweet crepes.
Pro Tip: If you’re out of milk, try half-and-half or even almond milk for subtle flavor variations.
And for gluten-free crepes, swap in a 1:1 gluten-free flour blend—it works surprisingly well!
How to Make the Best Classic Thin Pancakes Recipe

– Prep your tools and ingredients. Make sure all ingredients are at room temperature for even mixing. Lightly grease your crepe pan or skillet with butter or oil and set it on low heat to warm up gradually.
*Pro Tip:* Preheat your pan properly to avoid sticking—test it by sprinkling a few drops of water; if they sizzle and evaporate, it’s ready.
– Mix the wet ingredients. In a large bowl, whisk together the eggs, milk, water, and melted butter until fully combined. This creates a smooth base for your batter.
*Why It Matters:* Thoroughly mixing wet ingredients guarantees a consistent texture in your crepes.
– Incorporate the dry ingredients. Sift the flour and salt into the wet mixture to prevent lumps. Gently whisk until just combined—don’t overmix!
*Watch Out:* Overmixing can lead to tough crepes. A few small lumps are fine; they’ll dissolve during cooking.
– Rest the batter. Let the batter sit for at least 30 minutes at room temperature or up to an hour in the fridge. This allows the flour to hydrate and results in lighter, more tender crepes.
*Time-Saving Trick:* Prepare the batter the night before for quicker morning prep.
– Heat and pour. Pour about ¼ cup of batter into the preheated pan, quickly tilting and swirling to coat the surface evenly. Aim for a thin, even layer.
*Visual Cue:* The batter should spread smoothly and thinly across the pan. If it’s too thick, add a splash of milk to thin it out.
– Cook and flip. Cook for about 1-2 minutes until the edges lift easily and the bottom is lightly golden. Use a spatula to flip and cook the other side for 30 seconds to 1 minute.
*Pro Tip:* Flip confidently in one swift motion to avoid tearing.
– Stack and serve. Place cooked crepes on a plate, layering parchment paper or paper towels between them to prevent sticking. Serve warm with your favorite toppings.
*Flexibility:* Crepes can be made ahead and reheated in a warm oven or skillet.
– Customize your crepes. Fill with sweet toppings like Nutella, fresh fruit, or whipped cream, or go savory with cheese, ham, or sautéed veggies.
*Why It Matters:* Crepes are versatile—experiment with flavors to suit your taste!
Nutrition
Crepes are a versatile dish that can be enjoyed sweet or savory. Here’s the nutritional breakdown for a classic homemade crepe recipe.
| Nutrient | Amount per Serving |
|---|---|
| Calories | 90 kcal |
| Total Fat | 3 g |
| Saturated Fat | 1.5 g |
| Cholesterol | 35 mg |
| Sodium | 110 mg |
| Total Carbohydrate | 12 g |
| Protein | 3 g |
Chef Tips
Although making crepes might seem intimidating, I’ve found that a few simple techniques can make the process smoother. Let your batter rest 30 minutes—it prevents tearing.
Use a nonstick pan and keep it medium-hot. Swirl quickly to spread thin. Flip when edges lift easily. Stack cooked crepes with parchment between to avoid sticking.
Practice makes perfect, so don’t stress the first few!
Frequently Asked Questions
Can I Make Crepes Without a Crepe Pan?
Yes, you can make crepes without a crepe pan. I’ve used a regular nonstick skillet or frying pan—just make sure it’s hot and lightly greased. I tilt the pan to spread the batter thin, and it works fine.
How Do I Store Leftover Crepes?
I stack leftover crepes with parchment paper between each one, then wrap them tightly in plastic or foil. They’ll keep in the fridge for 2-3 days or freeze for up to a month.
Can I Freeze Crepe Batter?
I wouldn’t recommend freezing crepe batter—it changes the texture. Instead, I’d make the crepes fresh or freeze cooked ones. If I really had to, I’d freeze it for a day max, but it’s risky.
What’s the Difference Between Crepes and Pancakes?
Crepes are thinner and crispier than pancakes because I use less batter and spread it thinly in the pan. Pancakes are fluffier and thicker since I add baking powder and cook them in thicker portions.
Are Crepes Gluten-Free by Default?
Crepes aren’t gluten-free by default since they’re traditionally made with wheat flour. If I want gluten-free crepes, I’d swap it for alternatives like almond or rice flour to avoid gluten while keeping them light and delicate.


