
Recipe
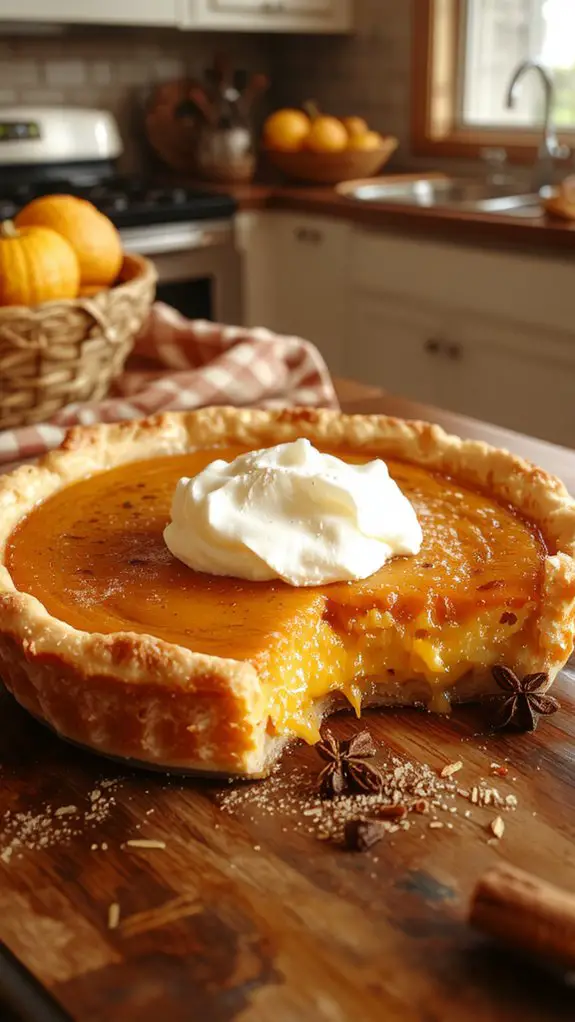
There’s something magical about a pumpkin pie that’s perfectly spiced, velvety smooth, and just sweet enough to feel like a hug in dessert form—and this Libby’s Pumpkin Pie recipe is the gold standard.
I’ve made this pie more times than I can count, and every single bite delivers that nostalgic, cozy flavor that makes Thanksgiving feel like home. The secret? Libby’s pure pumpkin puree, a blend of warm spices, and a flaky, buttery crust that melts in your mouth.
Whether you’re a seasoned baker or a pie newbie, this recipe is foolproof—just mix, pour, and bake for a dessert that’s creamy, rich, and downright irresistible. Trust me, one slice won’t be enough.
Ingredients
For the perfect Libby’s pumpkin pie, it’s all about balancing creamy, spiced filling with a flaky crust. Start with high-quality ingredients to guarantee a rich flavor and smooth texture. While some items are non-negotiable, there’s room for flexibility to suit your pantry. Here’s what you’ll need:
- Libby’s 100% Pure Pumpkin – The star of the show. This canned pumpkin is consistent in texture and flavor, delivering the perfect base. Fresh pumpkin can be unpredictable, so stick with Libby’s for assured results.
- Sweetened Condensed Milk – Adds creaminess and sweetness. Evaporated milk + sugar can work in a pinch, but condensed milk gives that signature richness.
- Eggs – Essential for binding the filling. Use large eggs at room temperature for even incorporation.
- Granulated Sugar – Balances the earthy pumpkin without overpowering it.
- Ground Cinnamon – A must-have spice for warmth and depth.
- Ground Ginger – Adds a subtle kick. Fresh grated ginger can work, but use sparingly as it’s more potent.
- Ground Nutmeg – Provides a nutty, aromatic note. Freshly grated nutmeg takes it up a notch if you have it.
- Salt – Enhances all the flavors. Don’t skip it.
- Unbaked Pie Crust – Homemade or store-bought, just make sure it’s chilled before baking for flakiness.
- Whipped Cream (optional) – For serving. Homemade whipped cream is a game-changer, but store-bought works in a pinch.
Pro tip: Toasting your spices lightly before adding them to the filling can release even more flavor.
And if you’re feeling adventurous, a splash of vanilla extract or a pinch of clove adds a lovely complexity to the pie.
How to Make the Best Libby’s Official Pumpkin Pie

- Preheat your oven to 425°F (220°C). This guarantees your oven is hot enough to set the pie crust quickly, preventing a soggy bottom.
- Prepare your unbaked 9-inch pie shell. If using a store-bought crust, make sure it’s thawed.
- For homemade, chill the dough thoroughly before rolling it out—this helps maintain the flaky texture.
- In a large bowl, combine the pumpkin puree, sugar, salt, cinnamon, ginger, and cloves. Mixing the spices with the pumpkin first secures even distribution and prevents clumping.
- Beat in the eggs one at a time, incorporating each fully before adding the next. This step confirms the filling is smooth and emulsified, creating a custard-like texture.
- Gradually add the evaporated milk, stirring gently. Overmixing can introduce too much air, which may cause the filling to puff and crack during baking.
- Pour the filling into the prepared pie shell. Use a spatula to scrape the bowl clean, ensuring you get every bit of that delicious filling.
- Bake at 425°F for 15 minutes, then reduce the oven temperature to 350°F (175°C) and continue baking for 40–50 minutes. This two-temperature method helps set the crust and cook the filling evenly without over-browning.
- Check for doneness by inserting a knife near the center. If it comes out clean, your pie is ready.
- Overbaking can cause the filling to crack, so keep a close eye in the final minutes.
- Let the pie cool completely on a wire rack before slicing. This allows the filling to set fully, making for cleaner slices and a better texture.
- Serve with whipped cream or a sprinkle of cinnamon for an extra touch of indulgence. Store leftovers in the fridge for up to 3 days.
- Pro Tip: Blind bake your crust (bake it empty with pie weights) for 10 minutes before adding the filling. This helps create a crispier crust and prevents sogginess.
- Watch Out: Avoid overmixing the filling, as it can lead to a dense, less tender texture. A gentle stir is all it needs!
Nutrition
This pumpkin pie recipe offers a delicious treat, but it’s also important to take into account its nutritional content.
Calories | 320
Total Fat | 15g
Saturated Fat | 7g
Cholesterol | 55mg
Sodium | 250mg
Total Carbohydrate | 40g
Dietary Fiber | 3g
Sugars | 24g
Protein | 6g
Chef Tips
When making pumpkin pie, I always recommend using fresh spices to enhance the flavor. Toasting them beforehand can deepen their aroma.
Blind-bake your crust to prevent sogginess, and let it cool slightly before adding the filling. Don’t overmix the batter—just combine until smooth.
Bake the pie on the lower rack for even heating, and use a pie shield to prevent crust overbrowning. Cool it completely before slicing.
Frequently Asked Questions
Can I Use Fresh Pumpkin Instead of Canned?
I can use fresh pumpkin instead of canned, but I’ll need to roast and puree it first. Fresh pumpkin has more water, so I’ll drain it well to avoid a soggy pie. It’s a bit more work, but worth it.
How Long Does the Pie Need to Cool Before Serving?
I’d let the pie cool for at least two hours before serving. It needs time to set properly, so I’d wait until it’s at room temperature. If I’m in a rush, I’d refrigerate it briefly, but patience helps.
Can I Freeze Leftover Pumpkin Pie?
Yes, you can freeze leftover pumpkin pie. I’d wrap it tightly in plastic or foil, then place it in an airtight container. It keeps for 1-2 months, but I recommend thawing it in the fridge before serving.
What’s the Best Way to Store Pumpkin Pie?
I’d cover my pumpkin pie tightly with plastic wrap or foil and keep it in the fridge for up to 4 days. If I want it longer, I’d freeze it—just wrap it well to avoid freezer burn.
Can I Make the Pie Crust Ahead of Time?
Yes, I make the pie crust ahead of time all the time. I wrap it tightly in plastic and refrigerate it for up to two days or freeze it for up to three months. It saves me time later!